Race Car Challenge
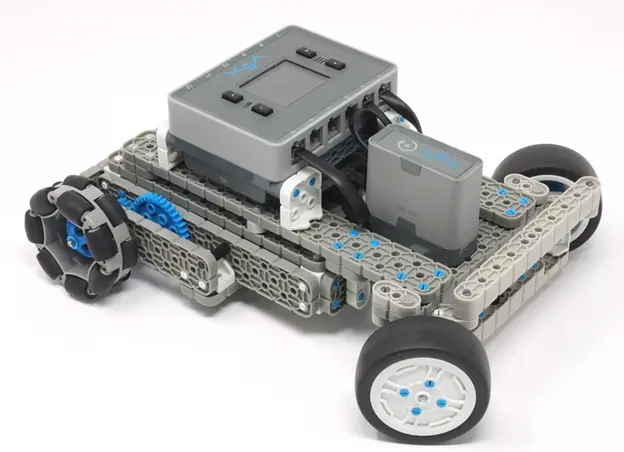
The goal of this exercise is to create a racing car game uses VEX IQ sensors to interact with the environment through obstacles, power-ups, and hazards. Students will split into the 3 teams based on their own strengths and preferences to design a real-life racing “video-game”.
The Mechanic Team
Hands-On, Attention to Detail, & Meeting Spec
This team will be responsible for modifying the OneKitProject Drifter Car to meet the following guidelines:
- Pick one RC car to be your prototype. The RC cars needs to be tough enough to survive crashing and getting rammed by other cars at various angles. Test drive it by crashing it several different ways to see if it has any weak points that are prone to breaking. If any part of the car breaks, find a way to redesign the car to either reinforce or protect the weak spot
- The car will need the following sensors added:
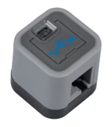 |
A Distance Sensor centered on the front of the car. |
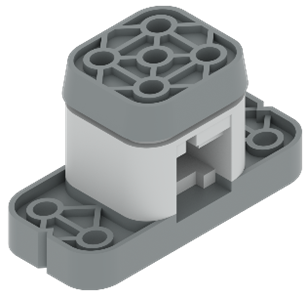 |
A Bumper Sensor on the bottom. This sensor must be mounted at a height where it does not touch the colored powerup/hazard markers but can hit the “super-powerup” markers. (See Construction Team instructions for more details.) |
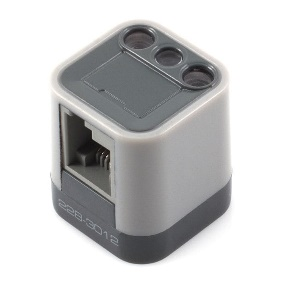 |
A Color Sensor on the bottom. Both bottom sensors should be centered with the color sensor directly behind the bumper sensor. |
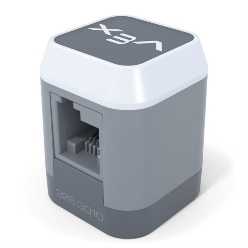 |
A TouchLED sensor centered on the Back. |
- Use the following port diagram when plugging in your components where ports 1-6 face the front of the car and 7-12 face the back.
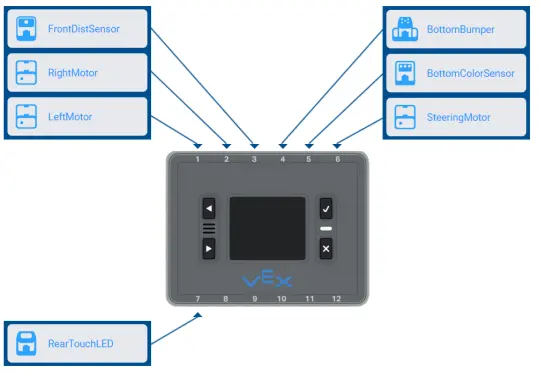
- Once you have your prototype car exactly how you want it, you will need to modify 2 more RC cars to identical to it so that they can all perform the same way while running the same program. Pay special attention to make sure that all parts are attached the same way and that every car is using the same gear ratios, wheel types, and that all wires are plugged into the same ports between cars.
- If any part of the prototype cannot be copied to 2 other cars because you do not have the right pieces, redesign the prototype using more common pieces and try again.
- While each car must work the same, they should be different colors. Add or replace parts on each car so that they all have a unique color. Make sure that all cars continue to use the same actual parts as one another, only the colors should be different.

- When the mechanics team thinks they are done, they will need to submit their vehicles to the instructor to make sure that all 3 vehicles are identical and fully to spec.
Additional Tasks
- If any changes need to be made to the cars for the other teams to complete their tasks, it will be the job of the mechanics team to make the changes, and make sure that the changes are the same across all 3 vehicles.
- If it is decided through testing that the cars are still to fragile, it is up to the mechanics team to continue trying different designs until they get one that is tough enough not to break.
- If the Mechanics team finishes all available work ahead of the other teams, they may split up to help the Construction Team with putting together field elements and/or the Programming Team with test driving the code, or they may add addition cosmetic parts to the cars like bumpers, spoilers, etc.
The Programming Team
Math & Physics, Attention to Processes, & Meeting Goals
This team will program the RC cars to interact with the racecourse by using different kinds of sensors to simulate Powerups and Hazards
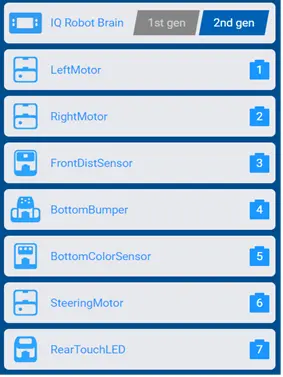 Start off by creating the following device configuration. Both the Engineering Team and the Programming Team will be responsible for making sure that they follow this device configuration to ensure that the cars and code are all compatible.
- Start programming by using the Drive Split base program from the website: https://www.onekitprojects.com/vexiq2/drifter-car
- Create a variable for modifying your car’s Speed. The existing program defaults to use the cars maximum speed, but we will reduce this to default to 70% of the car’s maximum speed as the “Normal” Driving speed.
- Design your own code to use your vehicle’s sensors to perform the following Status Effects:
- Ramming Speed: If the FrontDistSensor detects something within 50mm, and there are no other Status Effects in play, increase your maximum speed to 85%. This will help with speeding up to catch and ram other racers. If Ramming Speed is active, make the TouchLED on the back of your car turn Cyan.
- Rammed: If the RearTouchLED on the back of your car gets touched, cancel any existing Status Effects in play and cause a 3 second penalty where your steering becomes reversed. Turning your steering left makes you go right, and steering right makes you go left. If Rammed is active, make the TouchLED on the back of your car turn RED.
- Speed Booster: If the BottomColorSensor detects green, cancel any Status Effects in play and increase your maximum speed to 100% for 3 seconds. If Speed Booster is active, make the TouchLED on the back of your car turn Green.
- Speed Hazard: If the BottomColorSensor detects Yellow, cancel any existing Status Effects in play and decrease your maximum speed to 40% for 3 seconds. If Speed Hazard is active, make the TouchLED on the back of your car turn Yellow.
- Steering Hazard: If the BottomColorSensor detects Purple, cancel any existing Status Effects in play and make your “steering” variable so that it cannot go above a value of 50 so that your turning becomes less responsive for 3 seconds. If Steering Hazard is active, make the TouchLED on the back of your car turn Purple.
- SUPER Speed Booster: If the bottom bumper is hit while the color sensor sees green, cancel any existing effects in play and increase your maximum speed to 100% for 6 seconds. If SUPER Speed Booster is active, you are immune to all other Status Effects until the 6 second timer is up. Also, make the TouchLED on the back of your car Blink Wacky Colors while active.
- When the programming team thinks they are done, they will need to submit their code to the instructor to make sure that it meets all the requirements listed above.
- Once approved, they will need to get together with the Mechanic Team to upload and test their code.
Additional Tasks
- If any changes need to be made to the cars’ code for the other teams to complete their tasks, it will be the job of the programming team to make the changes.
- If it is decided through testing that the boosters feel like they are too potent or too weak, it is up to the programming team to adjust how long they last or how big of bonuses/penalties they give you.
- If the Programming team finishes all available work ahead of the other teams, they may split up to help the Mechanic Team with wiring and sensor placement and/or the Construction team with coding their autonomous field element. Or they may add sounds to go along with all the status effects.
The Construction Team
Creative Design, Attention to Functionality, & Meeting of Minds
This team will be responsible for designing the Race Track that the cars will drive on. It will be up to this team to include field elements that will work well with all of the sensors used in the RC cars, and to find a layout that is both fun and challenging for drivers to compete on.
- The Racetrack will be created by attaching 2 standard VEX fields to one another end-to-end.

- The track will then be divided by a central barrier to create a circuit to drive around in.

- Each Team Member will need to sketch out a field proposal that includes all of the following field elements. Sketches must include a graph with the correct number of grid spaces to represent accurate scale and positioning.
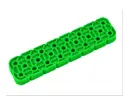 |
Speed Boosters. Pin one or more green beams to the field. Each time a car drives over one, it will get a 3 second speed bonus. |
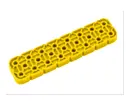 |
Speed Hazards. Pin one or more Yellow beams to the field. Each time a car drives over one, it will get a 3 second speed penalty. |
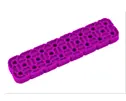 |
Steering Hazards. Pin one or more purple beams to the field. Each time a car drives over one, it will get a 3 second steering penalty making it harder to take sharp turns. |
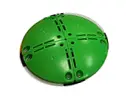 |
Super Speed Boosters. Pin one or more green domes to the field. Each time a car drives directly over one, it will get a 6 second speed bonus, and immunity to other status effects. |
 |
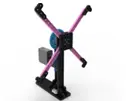
Obstacles. Design one or more obstacles that can physically block or interfere with a driver’s path. This could include walls, bridges, ramps, or whatever else you like. |
 |
Autonomous Obstacle. Design a single field element that moves using autonomous code. This “Robot” should be able to act in such way that creates a moving obstacle or hazard for drivers. |
- Once each team member is done with their design proposals, they will present their designs to the team. The Instructor will help guide the critique by asking the following questions of each student’s work:
- Explain your Autonomous Obstacle.
- Why did you place your field elements where they are?
- Do you think you have too many or too few field elements?
- What part of your track do you think will be the most fun?
- What part of your track will be the most frustrating?
- Are there any parts of your design that you don’t think you can make using Vex parts?
- Once everyone’s answered questions about their own work, everyone will answer these questions about other people’s work:
- What is your favorite Autonomous Obstacle?
- If you could change something about your favorite Autonomous Obstacle? What would it be?
- What is your favorite layout of field elements?
- If you could change something about your favorite field element layout? What would it be?
- The goal of these questions is to try to pin down the best over-all design and then refine it using everyone’s input. Once the questions have all been answered, the instructor should try to guide the children into combining their favorite ideas into a single final design that the team works together on.
- Once the final design is done, it must be approved by the instructor to make sure that the design meets all of the requirements in sections 1-3 and that it does not include any outlandish ideas that would be impossible or overly time consuming to make.
- Once the final design is approved, the team will need to work together to build the track according to the final design.
Additional Tasks
- If any changes need to be made to the track for the other teams to complete their tasks, it will be the job of the Construction team to make the changes.
- If through testing, it is decided that the field has too many or too few elements after it is built, it is the responsibility of the Construction Team to adjust the field until it meets a good balance of fun, difficulty, and usability.
- If the Construction team finishes all available work ahead of the other teams, they may split up to help the Mechanic Team with matching parts and/or the Programming team with coding. Or they may continue to add Aesthetic parts to the track.
